Showing posts with label Baked Goods. Show all posts

17 December 2015

Biscuit Cinnamon Rolls

Hey Folks!

I'm still here--just not photographing that same corn chowder I've now made about 100 times.  =)  

I had a brainstorm the other day I wanted to share in case anyone else wakes up at 7:30 am and wants to make a quick delicious breakfast in half an hour so his/her spouse can enjoy it before leaving for work!  Got that?

And it worked!  My brainstorm.  Fast cinnamon rolls made with biscuit dough instead of a lengthy-process yeasted dough. 


They were really delicious.  All I did was add a little sugar to a regular biscuit recipe, then rolled the dough out, spread a little oil on, sprinkled cinnamon and sugar, cut and baked.  In my toaster oven!  I love my toaster oven!  I'd say the whole process took about 20 minutes start to finish.

Then methinks to mineself: "hmmmm. . . this would be yummy as a savory roll too with scrambled eggs and cheese or ham and cheese!"  That's when I noticed this getting shared all over facebook.  Crazy, right?  

Well, I made my own biscuit dough from scratch, so there!  =)

Enjoy the not-so-original-brainstorm idea anyway!

08 August 2013

Pie Again

I posted what has become my favorite rhubarb pie recipe last summer when I first made it with rhubarb and blueberries.  This year I tried it with frozen--thawed--sliced strawberries, and it turned out fantastic again!  And pretty.


If you've got rhubarb, you really should try this simply delicious recipe!  And don't be afraid to use frozen rhubarb either--I dumped mine straight out of the freezer bag into the pie crust before it went in the oven and the texture was perfect.

08 April 2013

Bitty Cinnamon Rolls


The last two times I made bread, I snagged a bit of the dough to make some sweet rolls.  The first attempt was a cream cheese/strawberry mess of a roll that was too gooey to even cut into individual pieces.  I ended up baking the whole log in a round with a slashed top.  It came out of the oven looking pretty good, but caved in as it cooled into a very moist mess.  Yum.  We ate most of it, and I learned that my bread dough would definitely make a good sweet roll base.  As long as I used a drier filling.

Next up, plain old cinnamon-sugar rolls.  I used about a fourth of my dough recipe to make a pie tin's worth of rolls, shaping the rest of the dough into three small round loaves.  One thing I've been doing lately that seems to result in a moister, sweeter dough is to dump my whole grains (oats, whole wheat flour, flax, etc.) in with all the wet ingredients and letting that sit for awhile--30 minutes to a few hours as I have time/need of.  I think this lets those grains soak up more liquid before adding enough white flour to make the dough hold its shape.  If I would add all the flours at the same time, I would end up with a dough that seems like the right consistency but would dry out some as the whole grains continued to soak up moisture.  Make sense?

Anyhow.  Itty bitty cinnamon rolls.  

I rolled my bit of dough out pretty thin, spread with butter, sugar, and cinnamon, and then sliced them about 3-4 inches across after they were rolled up.  These were tall, skinny, and just funny looking in my pan, so I squashed them down with my hand until they just touched each other at the edges.  

Let rise until double and bake for about 15 minutes at 350F.  I had some leftover icing from another project that I slathered over the top when they had cooled some.  So yummy when they were still a little warm.  And good the next two days too. 


14 December 2012

Pogaca


Pogaca are little cheese/herb-filled Turkish pastries that I got a sudden hankering for last week.  My sister-in-law has never been afraid of making Turkish foods that she loves, so I was inspired to try these even though I'd never made nor seen them made before.  

First off, we must work on our pronunciation.  It might be tempting to look at "pogaca" and want to say "po-gak-a".  Um, no.  I apologize for not having Turkish characters (or not knowing how to access them), but the "g" should have a curl on its head (making it silent, drawing out the preceding vowel) and the "c" really needs it's tail (making it a "ch" sound).  Thus, we say "poh-ach-a" with a kind of dip in the voice after the "o".  All right, then.  Practice makes . . . good enough.

I found a great recipe online that yields a dough with a kind of flakiness.  It was very easy to work with and the pogaca were delicious--cold or re-heated--several days following.  The only changes I made to the recipe were to make a 1/2 batch (which I made into 20 pastries) and to use a mixture of feta and cottage cheese rather than all feta to make the inside a little creamier.  I think next time I would even go 1/2 and 1/2 on the cheeses; I would also make a 1/4 batch and do something like 15 pastries to get more of a two-bite size rather than a four-bite. 


I shaped mine by taking the ball of dough in both hands, sticking my thumbs in the center and turning it as if making a vase or cup on a pottery wheel.  You don't have to kick your foot as you do this, though.  Once I had the "walls" of the dough thin enough I put about a TBSP of filling in, pinched it shut, then turned it over and smoothed it back into a ball shape. 

As the recipe says, there is no need to pre-heat the oven (fun!), but I would recommend checking on them after about 25 minutes to see if they're browned to your liking.  I thought 35 minutes got them a little too dark for my taste.

If you're looking for an easy, fun pastry project that tastes delicious and keeps well, try making pogaca!  Did you remember to say "poh-ach-a"?

06 November 2012

Apple Pie: Two Ways


About a month ago I got all these apples at an Amish farm about 1/2 hour from where we live. Some of them were delicious and we made applesauce with them. Then others were just plain . . . plain (this is not an Amish joke).  They were bland. And I've been thinking of ways to use them (I think there are actually about a dozen still left). One of my ideas was to use them for jazzed-up pies. 


The first pie (pictured on the right) was traditional, the way my husband makes them: sliced apples piled high, then dumped out and tossed with lemon juice, sugar, and cinnamon and dumped back in. Or something like that. He usually finishes his apple pies off with a crumb topping, but I had plenty of pastry dough so I double-crusted mine.  Spoiler: this turned out to be the better of the two pies.  If it ain't broke, right?

The second way was an experiment for peanut-butter apple pie. My idea was to simply make crumbs as for a peanut butter pudding pie (peanut butter mixed with powdered sugar) and layer that with the apple slices. Sounds good, right? It turned out okay. Which is to say the crumbs kinda just got wet, and the apples didn't seem to cook through as well as they did in the traditional pie. Was it too many vents (cute hearts though they be?) that let the steam out instead of trapping it to cook the apples? Who knows. But I think if I tried this another time, I would make some sort of creamy peanut butter sauce and just put it under the apples because--as my apple-pie-expert husband points out--when you eat apples with peanut butter it's normally just a smear of peanut butter on one side of the apple. At least that's how we do it around here. 

 Any other suggestions?

24 January 2012

Oh How the Muffins Have Fallen!


Or maybe they never rose properly. I tried out an orange juice muffin recipe from the Hillbilly Housewife, substituting polenta for half the flour and topping them with an oatmeal streusel topping. Hmmmm . . . maybe I just tried to do too much. They came out kinda flat, with the topping caved in at the center. The streusel made them crunchy on top, and the polenta was a bit too gritty for my taste.

Next time, nix the streusel and go with corn meal instead of polenta. The flavor of the orange juice: yum.

09 November 2011

Pumpkin Cake with Brown Butter Frosting


Wow. Brown butter takes frosting to a new level! It gives a caramel-y punch that really means less icing for a LOT of flavor impact. Paired with pumpkin . . . you gotta do this!

The brown butter frosting is taken directly from Martha Stewart's website (find it here). I think I just added more powdered sugar to make it a little stiffer. I also used whipping cream (because I had it on hand) which made the frosting fluffier than it would have been with just milk.

The pumpkin cake recipe I found on allrecipes.com. I did scale it down to 11 servings instead of 14 for the two nine-inch rounds you see in the picture. For the sake of ease, I'll link to the recipe and also write out the measurements I used below:

Pumpkin Cake

1 1/2 c. sugar
1/2 c. vegetable oil
1/2 c. applesauce (or another 1/2 c. vegetable oil)
1 tsp vanilla
1 1/2 c. pumpkin (I used a mix of pumpkin and butternut squash)
3 eggs
1 1/2 c. flour
2 tsp. baking powder
1 1/2 tsp. baking soda
1/4 tsp. salt
1 1/2 tsp cinnamon
1/4 tsp. each of ground ginger, cloves, and nutmeg


Instructions: Beat sugar, oil, and applesauce together. Blend in cooked pumpkin (I never pureed mine, just scooped it out of the shell and dumped it into the batter!), vanilla, and eggs. Sift the remaining ingredients into the bowl and stir until smooth. Bake in two nine-inch greased and floured cake pans for 30 minutes at 350F (you'll have to adjust the baking time if you use a 9 X 13, bundt, or do cupcakes). And don't forget a light frosting of that brown butter icing!

22 July 2011

German Chocolate Cheesecake


For a friend's birthday recently, I got together with two other women to create this concoction. We combined a few recipes: one for the dark chocolate cheesecake (just the filling), and another for the crust (I think) and German chocolate cake topping. Viola! The best of both cheesecake and German chocolate cake. And it was GOOD! Smooth (a food processor makes all the difference in my opinion), chocolate-y, and just plain yumminess in that topping of coconut and pecans.

You really gotta try this, especially with the help of two other friends. Makes the process so much more fun. The only thing I would do different is make MORE of the topping so it could kinda drizzle down the side. Mmmmmm . . .


23 March 2011

Angel Food


This is a story about faith. About waiting and trusting that an un-seen, hoped-for result (as in the picture above) will take place. Like waiting for crocus to bloom in my yard after it seems everyone else's are up. And my all-too-often lack of such faith.

Armed with some brief instruction and a hand-written recipe on a slip of pink paper, I set out to make--for my younger brother and sister's joint birthday party--my first-ever Angel Food Cake. From scratch. I had deliberated about this, as it seemed like a complicated, unpredictable thing to make an angel food cake from scratch and the box mix costs just a few dollars. However, the list of un-pronouncable ingredients on the back of said box (along with some I can pronounce but prefer not to ingest), a little love of adventure, and not a little bit of pride helped to convince me to bake the scenic route (like that line?).

So to make angel food cake the "scenic route", you take a ton of egg whites, beat them into a heavenly frenzy with some sugar, vanilla (and almond, if you like) flavoring, and then--so as not to distress the airy batter--fold in some softly sifted flour/salt mixture, and bake it! Simple.

Let me tell you. If any part of this is going to cause you to have a nervous breakdown, sigh and moan frequently, and give in to a few curses, it will be the egg whites. Not that I know this from experience.

I whipped. And beat. And beat. And beat. Sugar. Beat. Beat. Beat. For about 30 minutes. This is not an exaggeration. I may be a wimp, but my arms hurt. And I was using an electric hand mixer! Whoever invented this recipe (if it was before the age of electric kitchen appliances) got a devilish delight out of calling it anything that refers to the heavenly realm!


Finally! It seemed I had achieved "medium peaks". And if they weren't medium, I didn't care!

Next, gently stir in the flour . . . a little . . . bit . . . at a time . . .


I had to test the consistency a lot.


Then--also gently--spoon the batter into the pan. No grease or that cake won't cling to the pan and rise properly!


You can see the lack of faith on my face, mingled with anxious hope.


I put it in the oven, turned on the timer, and left the kitchen. I'm not sure how I passed the time, but I did get up once to check on the cake. I made an audible exclamation which caused my husband to wonder if in distress or relief. It was a miracle! The cake was rising! Hooray!


Once it was done baking, the cake came out of the oven and was turned upside-down on the counter to cool. If cooled with the pan upright the cake can fall back down and ruin the effect.


To dress it up for the party, I bought a tub of whipped cream and some frozen blueberries to make blueberry sauce. Isn't it pretty?!?


And it tasted good too. Relief! Since I used raw sugar (whizzed to a fine powder in my food processor) it looked a little darker than a normal angel food cake.


Would I do this again? Maybe. But probably only for a special occasion!

20 October 2010

Butternut Pie


Nothing novel here. Just take your favorite pumpkin pie recipe and substitute an equal amount of butternut squash puree for the pumpkin! This is for those of you who are lucky enough to have an abundance of butternut in your garden. Or for those of you who don't want to mess with cooking a whole pumpkin.

I just cut my butternut into small pieces, peel, and cook them with minimal water. When soft, I mash them roughly with a fork and let them cool a bit. When you're ready to make pie filling, lob all the ingredients into a blender. This ensures that the squash will get smoothly pureed.

Happy autumn cooking!


"bitten"


Taste-tester reports that the pie is yummy but a little too spicy. Cook's note-to-self: hold some of the cloves next time!

15 June 2010

Crust


Can I tell you how absolutely thrilled I am to have found a pastry recipe that doesn't demand the utmost strictness concerning the temperature of the butter? And still turns out nice and flaky every time.

Well, I am thrilled.

No more ice cube water. No more over-watering and over-mixing my dough. No more cries of agony at the crumble-factor as I engage in a pastry vs. rolling pin war where the pastry only gives up when I throw it in the oven (even then it scores a smug victory by coming out thin and tough).

I found a recipe for a hot water pie crust here on allrecipes.com. It does mix up pretty soft, so I generally refrigerate it for about 10-15 minutes before rolling it out--don't over-chill it or it will be too hard to roll! I use all butter for the shortening too, so it has great buttah flavah! It's simple enough to whip up fairly quickly and makes a versatile pastry.


Last week we were putting these in it . . .


. . . and with that little-bit-that-comes-off-the-edges
I did a mini zucchini tart in a souffle cup! Sauteed zucchini,
some cottage cheese, pizza sauce, and mozzarella.


I also used this recipe when I made samosa's with Michelle. That time I used a bit of whole wheat. Just because. It gives all that butter a healthy edge.

Right.

If you've ever been frustrated with making pastry, try the hot water recipe. I find it keeps me from overworking the dough once I add flour at the end. And it's so easy! And it really does make a flaky crust!


*(not guaranteed to make all your wildest dreams come true, but pretty close if you're dreaming about pie)

07 June 2010

Scones, Again


I really outdid myself on Saturday with all the baking/cooking projects I had going on. Read: "I made a HUGE mess of my kitchen!"

The upside of all the mess was a lot of good food and some material for my sadly-neglected-of-late cooking blog. I actually posted my basic scone recipe awhile back, but I was so enamored of the scones I made on Saturday that I have to write about them. anyway Actually, this post could also be called "Toaster Oven" because I was as pleased about using mine to bake the scones as I was about the scones themselves. Only the toaster oven doesn't hit your tongue with that soft, cake-like texture and velvety, melting chocolate-y goodness as a scone does, see?

But when you feel like baking something small-ish on a hot-ish day, there is much praise to be sung in honor of the humble counter-top oven. No heat waves pouring into the kitchen and onto your skin. No enormous waste of energy just to bake one small pat of scones. No half hour waiting for it to heat up. Yay! I love our toaster oven (many thanks go to my husband's late paternal grandmother for this inherited treasure).

So, scones in the toaster oven; a killer combination. In less than 30 minutes, you can go from raw ingredients to delectable breakfast (including coffee brewing time). Have I convinced you that you want to:

a. buy a toaster oven?
b. make scones?
c. bake scones in your toaster oven?
d. all of the above?

If so, read on. If not, read on.

Another one of the great things about scones (besides the close-to-immediate-gratification factor) is the ease and simplicity of forming them. You could spend some time and lots of flour patting them out and cutting them into cute shapes to bake them. But the truth is they taste just as good if you dump the dough on your greased baking sheet (in this case, the toaster oven tray insert), pat them into any odd shape, and score them into the approximate size you want to ingest them in. This past Saturday I made an flat ovally shape, scored them into rough squares, and slapped them on in the oven. No need for fussiness here.


When those babies came out I immediately drizzled them with some orange-chocolate icing I had on hand, and I thought they looked kinda pretty.

(Can I insert another ode in praise of scones? They are so deliciously versatile! Put in them whatever you have on hand in the way of dried fruits, nuts, spices, flavorings. Really, the basic recipe is that: basic. You get the fun of making them uniquely tasty each time you whip up a batch. These have cranberries, chocolate chunks, and vanilla in them.)


I waited awhile for my taste-tester to get back from a project he was working on, but I couldn't hold out for long against the alluring smell of these gems. Mug of coffee nearby, and camera in hand, I did some serious damage to a few.


"the last bite"


Now do you want scones?

Basic Scones
(makes two rounds, depending on how you form them--these pictures show a half recipe)

1 3/4 cup flour (may subs. other flours for texture, fiber, etc.)
3 tsp baking powder
1/4 cup sugar
1/8 tsp salt
5 TBSP butter
1/2 cup milk
1/4 cup yogurt

Instructions: Sift flour, baking, powder, sugar, and salt into a bowl. Cut in butter until it is in pea-size chunks. Stir in any dried fruit/nuts. Add milk and yogurt, and stir minimally! Dump dough onto greased baking sheet, push into desired shape and score with a knife. You may brush them with milk/egg if you want a shiny finish. Bake at 400F for 15 minutes.

05 May 2010

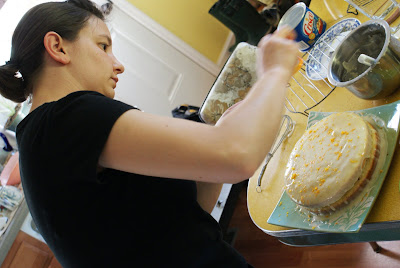
Orange Coconut Cake


This is a result of poor planning. Or not thinking ahead. Fortunately, it turned out really, really yummy--a perfect summery cake!

I called the grocery store bakery at 4:00pm on Tuesday, wondering if they would be able to do a cake for me by 6:00pm. Of the same day. No they do not--you must call 24 hours ahead. Okay, then. Making a mental list of the ingredients I had on hand at home, I skipped the store altogether and hoped for the best. One yellow cake recipe with some modification, a quick trip out just for confectioners sugar, and an hour later the cake pictured above was party-ready.

It began with this recipe and morphed from there. I'll have to give just the cake recipe since I didn't really write down ingredients for the cream cheese filling and glaze. Just do your own thing. A generous sprinkling of toasted coconut and some orange zest accompanied the filling.

Anita's Orange Cake
(2 9-inch layers)

2 cups all-purpose flour
2 tsp baking powder
1/2 tsp salt
1/2 cup butter, softened
3/4 cup sugar
3 eggs
1 1/2 tsp vanilla
zest of one orange
1/4 cup fresh-squeezed orange juice
1/2 cup milk

Instructions: Sift dry ingredients together and set aside. Beat butter and sugar. Add in eggs, one at a time, beating after each to incorporate. Add vanilla and zest and beat in. Mix orange juice with milk and add to batter alternately with flour mixture. Batter will be light and fluffy. Spread into 2 greased and floured 9-inch pans and bake at 350F for 20-25 minutes. They will look very light in color when they are done, so test with a toothpick if you are unsure!


I filled the layers with a cream cheese/butter/o.j./confectioners sugar frosting and a generous sprinkling of coconut and more orange zest. I would recommend mixing the coconut into it, so that the two layers will hold together when cut. I thinned the filling and drizzled it as a glaze over the top layer, adding more orange zest and "YAY" in toasted coconut (the cake was for a graduation celebration party).


on the way to the party . . .


moist, light, summery-tasting!


and this is what we left behind . . . *sigh*

27 March 2010

Saturday Morning Breakfast


Maybe this post belongs in the "Confessions Archives" because I'm really just putting it here for the pictures. I like them. =) The muffins weren't that spectacular--I'm not a fan of the cornmeal I put in them. But along with the coffee brewing, they made the house smell like a warm, cozy bakery--a nice antidote to the plunging temperature we're experiencing now.


Maybe I'll go redeem my day--culinary-wise--by making a batch of fresh pasta . . .

13 January 2010

Little Women

It's a Christmas/winter tradition. Watching "Little Women" with Mom and whichever sisters are around. Since we were having dinner first, I thought we should eat "period" foods. Mom supplied a lentil/ham soup and salad. Bek brought bread. And I brought dessert.


only a few cookies made the cut
for the women-only party


I left some at home for my taste-tester. He so tirelessly and unselfishly puts up with all this.


Thanks, Esther, for the recipe (page 179 in "Mennonite Country-Style Recipes")! My only complaint this time is the sexist recipe title. I did wonder about heating the molasses. I skipped that and thought my cookies tasted just fine. Anyone know why heating the molasses would make a difference?

28 December 2009

Birthday Pie


Whenever I solicit a special dessert request, my husband usually asks for pie. His favorites? Shoo-fly and pecan. For his 30th birthday this year, he was in a pecan mood.


I like pecan pie too, but I'm not a huge fan of pecan pie which is basically a custard with some pecans floating on top. I want a dense, not-too-too-sweet pie chock-full of pecans. This one fit the bill (and I think he liked it too!). Now let me go find that splattered piece of paper I wrote everything down on so I can pass the goodness to you . . .


Birthday Pecan Pie

1 c. pecans, chopped and toasted
1 c. brown sugar
1/4 c. white sugar
2 eggs
1/2 c. butter, softened
1 TBSP flour
1 TBSP milk
1 tsp. vanilla
1 tsp. maple flavoring


Place pecans in un-baked pie shell (I pre-baked mine a few minutes so it wouldn't get soggy). Beat together eggs and sugars. Stir in butter. Add remaining ingredients and stir until smooth. Pour filling over pecans. Bake at 350F for 10 minutes, then reduce temperature to 300F and bake another 40-50 minutes. Let pie cool to room temperature before eating. No need to garnish!


14 December 2009

Sweet Potato Pecan Pie

See that pie on the right? After testing and re-testing my pumpkin pie recipe for Thanksgiving, I ended up liking this sweet potato pecan pie even better.


I found the recipe here at allrecipes.com. I made a few changes because we were running low on brown sugar (and something else I can't remember anymore), but it was so simple. I just threw my cooked, diced sweet potatoes in the blender with all the ingredients except the pecans, and whizzed until smooth! Pour into the pie crust, sprinkle pecans on top, and that's it! The filling did make more than would fit in my standard 9-inch pie pan (try a deep dish pan), so I ended up making a mini one for the in-laws too. Try it for yourself!

11 December 2009

Recipe Exchange


One of my favorite Christmas cookie recipes has to be Nutmeg Logs from the "Pantry Gems II" cookbook. The recipe is attributed to Dorothy Cross--thanks for sharing Dorothy!

While the instructions say to roll the dough out and cut into strips, I go ahead and use cookie cutters to make more festive shapes. One trick I learned while scouring the internet for rolled cookie recipes was to dust the table and rolling pin with powdered sugar rather than flour to keep the cookies from getting too floury. Worked pretty well! I also like to bake these cookies until they are brown on the edges--yummy crunchy, buttery flavor.


Nutmeg Logs (or shaped cookies)

3 cups flour
1 tsp nutmeg
1 cup butter
2 tsp vanilla
2 tsp rum flavoring
3/4 cup sugar
1 egg

Instructions: Mix ingredients together for a dough that resembles pie crust. Roll 1/2-inch thick and cut into shapes as desired. Bake at 350F for 12-15 minutes.


Frosting

3 TBSP butter
1/2 tsp vanilla
1 tsp rum flavoring
2 1/2 cups powdered sugar
2 to 3 TBSP cream

Beat until spreading consistency and frost cookies when cool.


Got any favorite Christmas cookie recipes to share?